How to become a Content Creator in 2024: A Beginner's Guide with small Budget
Introduction
Are you dreaming of becoming a content creator and digital nomad, traveling the world and sharing exciting stories on a travel and food blog? In this comprehensive beginner's guide, we'll show you how to create amazing content with simple equipment and free software. Whether you're 15 or 75 years old, this guide is made for you!
1. The Right Equipment to Get Started
1.1 Laptop and Smartphone
Your current setup includes an old laptop with Linux Mint and a Xiaomi Redmi 8 T phone? With a few upgrades, you can optimize your setup for content creation.
Laptop
You can optimize your current laptop by upgrading the following components:
Install an SSD: A Solid State Drive (SSD) will make your laptop faster.
Add more RAM: Additional RAM (Random Access Memory) will improve performance.
Suggestions below
Recommendations
Crucial MX500 SSD 500GB (around $50)
Kingston 8GB RAM DDR4 (around $40)
Smartphone
Your Xiaomi Redmi 8 T can still be used for photography and social media. If you need better camera quality, consider an upgrade.
Recommendation:
Xiaomi Mi 11 Lite 5G (around $300)
1.2 Additional Hardware
To work more professionally, a few additional devices can be helpful:
Camera
An entry-level DSLR or mirrorless camera will deliver excellent image quality.
Canon EOS M50 MKII (around $750)
Sony Alpha 6000 (around $600)
Tripod
A lightweight travel tripod stabilizes your shots.
Manfrotto Compact Action Tripod (around $80)
Drone
For impressive aerial shots.
DJI Mini 2 (around $380)
Power Bank
A powerful power bank is essential on the go.
Anker PowerCore 20100mAh (around $50)
2. Software and Tools for Content Creation
2.1 Photo Editing
For editing your photos, there are excellent free software options.
GIMP
GIMP (GNU Image Manipulation Program) is a free photo editing program that offers many features similar to Adobe Photoshop.
Installation for Linux User in the Shell
sudo apt update
sudo apt install gimp
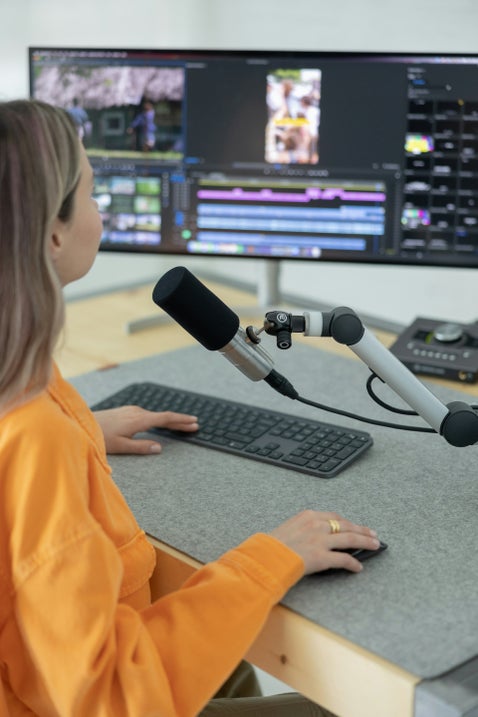
2.2 Video Editing
For video editing on Linux Mint, there are user-friendly programs available.
Kdenlive
Kdenlive (KDE Non-Linear Video Editor) is a powerful video editing software with many features.
Installation
sudo apt update
sudo apt install kdenlive
Shotcut
Shotcut is a cross-platform video editing software that is great for beginners.
Installation
sudo apt update
sudo apt install shotcut
OpenShot
OpenShot is another user-friendly video editing software that is good for simple projects.
Installation
sudo apt update
sudo apt install openshot
2.3 Website and Blog
Having your own website and blog is essential for content creators.
Webador
Since you are already satisfied with Webador, you can continue to run your blog and website there.
2.4 SEO Tools
Search Engine Optimization (SEO) is important to make your content visible.
Yoast SEO
Yoast SEO is a free plugin for WordPress that helps you optimize your content for search engines.
2.5 Social Media Management
To efficiently manage your social media channels, there are useful tools.
Buffer or Hootsuite
Buffer and Hootsuite are free tools for scheduling and managing social media posts.
3. Simple Video Editing with Kdenlive: A Step-by-Step Tutorial
Getting Started with Kdenlive
1. Start Kdenlive: Open Kdenlive from the start menu.
2. Create a New Project: Click "New Project" and select the desired settings (e.g., HD 1080p).
3. Import Media: Drag your videos and images into the project window or import them via "File" > "Import".
4. Drag Clips to the Timeline: Drag the imported media to the timeline at the bottom to start editing.
5. Edit and Cut: Use the tools in the toolbar to cut and edit your clips.
6. Add Transitions and Effects: Click "Effects" and choose the desired effects and transitions.
7. Save and Export Your Project: Save your project regularly. When you're done, click "File" > "Render" and choose the desired output format.
Step-by-Step Guide
Set Up Your Project
After installing and starting Kdenlive, set up your new project:
Create a New Project: Select "New Project" on the start screen.
Project Name and Location: Name your project and choose the save location.
Video Settings: Choose the appropriate video settings, e.g., HD 1080p or 720p.
Import Media
Import your videos, images, and audio files:
Import Media: Drag the files into the "Project Bin" area or click "Project" > "Import".
Organize: Sort media into different folders for better organization.
Edit Clips
Start editing your clips:
Drag Clips to the Timeline: Drag media to the timeline at the bottom.
Cut and Trim: Use the cutting tool to remove unwanted parts.
Add Transitions: Click "Effects" and choose transitions for smooth transitions between clips.
Add Effects and Titles
Give your video the finishing touches:
Apply Effects: Choose from a variety of effects and drag them onto your clips.
Create Titles: Click "Project" > "New Title" to create titles and text overlays.
Save and Export Your Project
Save and export your finished video:
Save Your Project: Click "File" > "Save" or "Save As" to save your project.
Export Video: Click "File" > "Render", choose the output format, and start the export.
4. Conclusion
With the right equipment and software, you can create amazing content as a content creator and digital nomad. Whether you're just starting out or have some experience, this guide provides you with the basics to get started. Optimized hardware, powerful and user-friendly software, and useful tools make it easy to unleash your creativity. Good luck with your projects!
If you enjoyed this post, feel free to share it with your friends and follow my blog for more tips and tutorials!
Stay tuned, I'll soon be discussing audio equipment for little money and working with Audacity
Add comment
Comments